
Bee-Keeper's Manual Apiary Shed
A yellow-walled tool shed joins a screened flower court with a slatted roof and four empty hive positions, useful for manually tending an apiary at a survival base.
WorldEdit .schem available. No native .litematic file for this build.
3D Preview
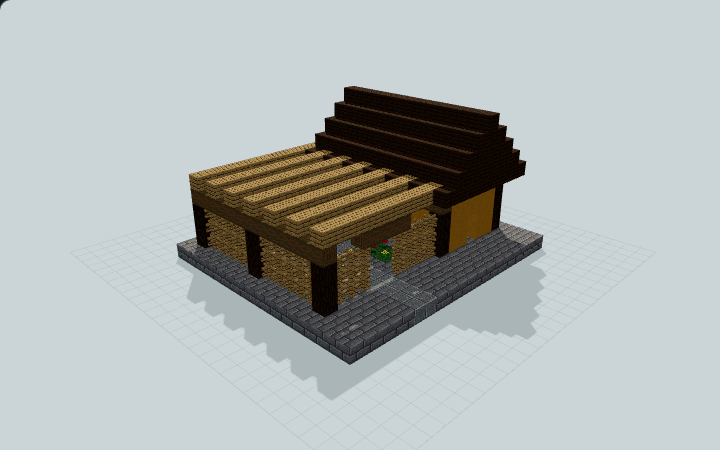 Loading 3D preview…
Minecraft Java Edition · Sponge .schem
Verification details
No revision-bound verification record is currently published for this build.
A 3D preview shows appearance, not game behavior. Bedrock conversion and Litematica compatibility are not verified unless separately recorded.
Manual apiary setup
The shed and court provide empty hive positions, flowers and storage for your own beekeeping supplies.
- 1
Place and stock the shed
Place the stone base on level ground. Enter the north tool-room door and stock the barrels with your own bottles and shears.
- 2
Prepare the hive court
Use the side door or recessed court opening. Introduce and manage bees yourself; each empty hive faces the clear walkway to its west.
No bees, honey inventory, automatic collection, smoke protection or measured honey yield is included or verified. The screen is architectural, not a proven bee enclosure.
Build Facts
JSON fact sheet- Dimensions
- 19 x 10 x 17 blocks
- Compiled blocks
- 975
- Category
- other
- Updated
Curated by MinePilot from a CraftDAG component plan. Canonical page: https://www.myminepilot.com/builds/bee-keeper-apiary-shed
Materials
975 blocksPlaced block counts · stack equivalents, not crafting ingredients. Expand for exact BlockStates.
 Dark Oak Planks3134×64 + 57
minecraft:dark_oak_planks× 313 Stone Bricks2513×64 + 59
minecraft:stone_bricks× 251Yellow Terracotta841×64 + 20
minecraft:yellow_terracotta× 84 Oak Fence811×64 + 17
minecraft:oak_fence[east=true,north=true,south=true,waterlogged=false,west=true]× 81 Oak Planks771×64 + 13
minecraft:oak_planks× 77 Polished Andesite38Placed blocks
minecraft:polished_andesite× 38Stripped Spruce Log3030 / 64 stack
minecraft:stripped_spruce_log[axis=z]× 26minecraft:stripped_spruce_log[axis=x]× 4 Spruce Log2929 / 64 stack
minecraft:spruce_log[axis=y]× 29 Smooth Stone22Placed blocks
minecraft:smooth_stone× 22 Glass1212 / 64 stack
minecraft:glass× 12 Grass Block1212 / 64 stack
minecraft:grass_block[snowy=false]× 12Beehive4Placed blocks
minecraft:beehive[facing=west,honey_level=0]× 4Dandelion4Placed blocks
minecraft:dandelion× 4 Spruce Door44 / 64 stack
minecraft:spruce_door[facing=east,half=lower,hinge=left]× 1minecraft:spruce_door[facing=east,half=upper,hinge=left]× 1minecraft:spruce_door[facing=north,half=lower,hinge=left]× 1minecraft:spruce_door[facing=north,half=upper,hinge=left]× 1Allium2Placed blocks
minecraft:allium× 2 Barrel22 / 64 stack
minecraft:barrel[facing=east,open=false]× 2Cornflower2Placed blocks
minecraft:cornflower× 2Crafting Table22 / 64 stack
minecraft:crafting_table× 2Oxeye Daisy2Placed blocks
minecraft:oxeye_daisy× 2Poppy2Placed blocks
minecraft:poppy× 2Torch22 / 64 stack
minecraft:wall_torch[facing=east]× 1minecraft:wall_torch[facing=west]× 1Layer Guide
10 layersImport Guide
Java Edition- Download the protected
.schemfile for Bee-Keeper's Manual Apiary Shed. - Place it in your WorldEdit or Litematica schematics folder.
- Load the schematic in-game, preview placement, then paste or build layer by layer.
Finding related builds…


