Manual Furnace Workshop Pavilion
A brick furnace pavilion with six hand-fed furnaces, a tall masonry chimney, open service gallery and lower fuel store, built for hands-on smelting at your survival base.
WorldEdit .schem available. No native .litematic file for this build.
3D Preview
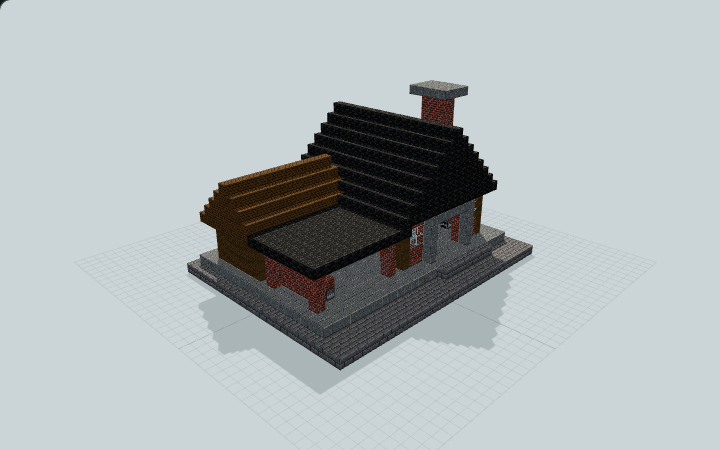 Loading 3D preview…
Minecraft Java Edition · Sponge .schem
Verification details
No revision-bound verification record is currently published for this build.
A 3D preview shows appearance, not game behavior. Bedrock conversion and Litematica compatibility are not verified unless separately recorded.
Manual Workshop Setup
Six ordinary furnaces and empty containers provide manual workstations; no item transport, fuel automation or inventory contents are included.
- 1
Place and enter
Paste on a level surface with the front steps exposed. Walk up the one-block plinth through the broad north opening.
- 2
Fuel the furnaces
Use the three hall furnaces facing east and the three gallery furnaces facing west. Insert valid fuel and ingredients into each furnace yourself.
- 3
Stock the stores
Fill the fuel-store barrels and use the two separate rear hall chests for finished supplies. Containers are initially empty.
Static geometry, access and schematic checks are provided. Minecraft client interaction, inventories and throughput have not been tested; this is not an automatic smelter.
Build Facts
JSON fact sheet- Dimensions
- 29 x 17 x 23 blocks
- Compiled blocks
- 3,190
- Category
- other
- Updated
Curated by MinePilot from a CraftDAG component plan. Canonical page: https://www.myminepilot.com/builds/hand-fired-furnace-workshop
Materials
3,190 blocksPlaced block counts · stack equivalents, not crafting ingredients. Expand for exact BlockStates.
 Deepslate Tiles1,177Placed blocks
minecraft:deepslate_tiles× 1,177 Stone Bricks67510×64 + 35
minecraft:stone_bricks× 675 Polished Andesite548Placed blocks
minecraft:polished_andesite× 548 Spruce Planks3134×64 + 57
minecraft:spruce_planks× 313 Bricks2944×64 + 38
minecraft:bricks× 294Stripped Spruce Log1382×64 + 10
minecraft:stripped_spruce_log× 138 Glass2424 / 64 stack
minecraft:glass× 24 Furnace66 / 64 stack
minecraft:furnace[facing=east,lit=false]× 3minecraft:furnace[facing=west,lit=false]× 3Coal Block44 / 64 stack
minecraft:coal_block× 4 Barrel33 / 64 stack
minecraft:barrel[facing=north,open=false]× 2minecraft:barrel[facing=west,open=false]× 1Torch33 / 64 stack
minecraft:wall_torch[facing=west]× 2minecraft:wall_torch[facing=east]× 1 Chest22 / 64 stack
minecraft:chest[facing=north,type=single,waterlogged=false]× 2 Lantern22 / 64 stack
minecraft:lantern[hanging=false,waterlogged=false]× 1minecraft:lantern[hanging=true,waterlogged=false]× 1Crafting Table11 / 64 stack
minecraft:crafting_table× 1Layer Guide
17 layersShowing the first 12 layers. Open the playground for the full interactive layer slider.
Import Guide
Java Edition- Download the protected
.schemfile for Manual Furnace Workshop Pavilion. - Place it in your WorldEdit or Litematica schematics folder.
- Load the schematic in-game, preview placement, then paste or build layer by layer.
Finding related builds…